Late in a project, pressure builds as practical completion approaches and trades overlap in tight spaces. A snagging inspection brings structure to that chaos, turning observations into a snagging list that keeps finishes, compliance and client expectations aligned before handover. Done well, it protects programme, reputation and final payment positions.
What Is a Snagging Inspection?
A snagging inspection is a structured review of completed construction work carried out before practical completion to identify defects, incomplete items and workmanship issues. Led by the contractor, client team or employer’s agent, it produces a formal snagging list — a documented record of items that must be rectified before handover and release of retention monies.
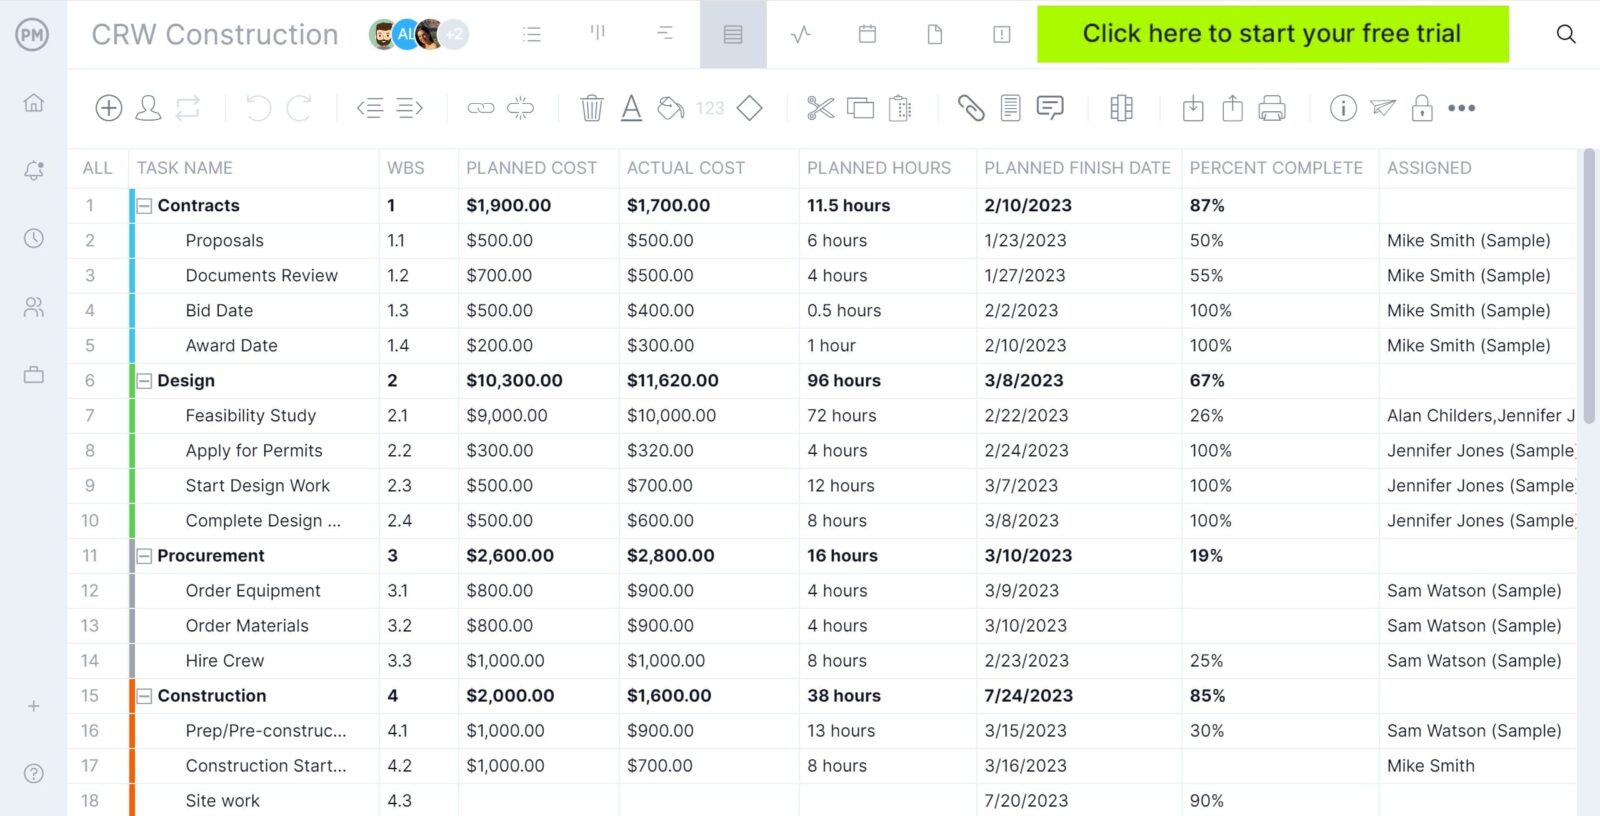
ProjectManager is an award-winning construction project management software equipped with features such as Gantt charts, task lists, timesheets and real-time project dashboards and reports, which make it perfect for planning, scheduling and tracking construction projects from start to finish. Get started for free today.
What Is the Purpose of a Snagging Inspection
At its core, the purpose of a snagging inspection is to generate a clear, actionable snagging list that confirms whether the works meet the required standard before practical completion is certified. It gives the project manager visibility of outstanding issues, ensuring subcontractors rectify defects promptly and the building can be handed over without dispute or delay.
- To create accountability by allocating each snag on the snagging list to the responsible subcontractor with clear deadlines for rectification.
- To protect retention release by using the snagging list as evidence that identified defects have been properly addressed.
- To reduce post-handover callbacks during the defects liability period by resolving items formally captured on the snagging list.
- To support compliance with contract requirements under JCT or other UK forms through a documented and trackable snagging list.
- To maintain client confidence by demonstrating structured quality control through a transparent and well-managed snagging list.
When Should a Snagging Inspection Be Performed?
Timing matters. A snagging inspection should be carried out once works are substantially complete but before practical completion is certified, so the resulting snagging list reflects finished installations rather than incomplete areas. Scheduling it slightly ahead of formal handover gives subcontractors space to clear listed items without disrupting programme commitments.
Who Participates in the Snagging Inspection?
On most UK construction projects, the main contractor is ultimately responsible for organising the snagging inspection and producing the snagging list, as they control the works and manage the subcontractors. However, accountability extends beyond one party, with the employer’s agent or contract administrator overseeing standards and confirming readiness for practical completion.
- The project manager coordinates the inspection logistics, aligns it with programme milestones and ensures each snag is recorded clearly, assigned to the correct trade and tracked through to verified rectification before practical completion.
- The site manager leads the physical walkthrough, identifies workmanship issues, challenges subcontractors on standards and confirms whether items are genuinely complete or simply presented as finished under time pressure.
- The employer’s agent or contract administrator reviews the condition of the works, challenges quality where necessary and determines whether outstanding snags prevent certification of practical completion under the contract.
- Subcontractors attend to clarify scope boundaries, accept responsibility for allocated snags and programme corrective works so defects are resolved without disrupting other trades still completing adjacent areas.
- The clerk of works, where appointed, independently inspects finishes and installations, documenting quality concerns and ensuring that materials and workmanship comply with specifications, drawings and agreed performance standards.
Related: 20 Best Construction Scheduling Software for 2026 (Free & Paid)
How to Conduct a Snagging Inspection
Running a snagging inspection properly takes preparation, structure and follow-through. The goal is not simply to walk the building, but to produce a clear, controlled snagging list that can be closed out efficiently before practical completion.
- Confirm readiness: Begin by ensuring the area is genuinely ready for inspection, with finishes complete, fixtures installed and relevant services commissioned. Inspecting too early fills the snagging list with incomplete works rather than true defects, creating noise instead of actionable quality control.
- Review contract documents: Study drawings, specifications and employer’s requirements before stepping onto site. Understanding the agreed standard allows you to distinguish defects from scope misunderstandings, ensuring the snagging list reflects contractual obligations rather than subjective preferences.
- Coordinate attendees: Invite key subcontractors, the site manager and, where appropriate, the employer’s agent or clerk of works. Having decision-makers present during the walkthrough reduces later disputes and ensures the snagging list is agreed in principle at the point of inspection.
- Inspect methodically: Walk the works in a structured sequence, typically room by room or zone by zone, documenting each issue clearly. Record exact locations, concise descriptions and supporting photographs so the snagging list leaves no room for interpretation or dispute.
- Differentiate defects from omissions: Separate genuine workmanship defects from incomplete or outstanding works. Categorising items correctly on the snagging list prevents confusion, supports fair allocation to trades and avoids inflating defect counts with simple sequencing issues.
- Allocate responsibility immediately: Assign each snag to the appropriate subcontractor or trade package as it is identified. Capturing ownership during the inspection prevents later arguments about scope boundaries and turns the snagging list into a live accountability tool.
- Agree rectification deadlines: Set realistic completion dates aligned with the programme and remaining works. Integrating snag resolution into short-term planning ensures the snagging list progresses steadily instead of becoming a last-minute scramble before practical completion.
- Track progress formally: Maintain the snagging list as a controlled document, updating status, dates and evidence of completion. A live tracker prevents items from being forgotten and gives the project manager a clear view of readiness for practical completion.
- Verify and close out: Reinspect remedial works before removing items from the snagging list. Do not rely on verbal confirmation; physically confirm quality and completeness to protect handover standards and safeguard retention release.
What Is a Snagging List?
A snagging list is a formal document produced during or after a snagging inspection that records defects, incomplete items and workmanship issues identified before practical completion. In UK construction projects, it assigns responsibility to specific subcontractors, sets rectification deadlines and tracks progress until each item is resolved and verified prior to handover.

What Should Be Included in a Snagging List?
Precision matters. A thorough snagging list removes ambiguity, prevents disputes between trades and gives the project manager a reliable tool for driving rectification before practical completion is certified.
- Project information: Include project name, site address, contract reference, inspection date and relevant phase or plot to clearly identify the scope of works covered by the snagging list.
- Unique snag reference number: Assign a distinct identifier to each snag so items can be tracked, updated and referenced easily during rectification and close-out meetings.
- Exact location details: Record block, level, unit, room number or grid reference to eliminate confusion and ensure subcontractors can quickly locate the issue on site.
- Clear description of the issue: Provide a concise but precise explanation of the defect, omission or workmanship concern to avoid interpretation disputes between trades.
- Photographic evidence: Attach dated photographs supporting each snag entry to provide visual context and reduce disagreements about the original condition of the works.
- Responsible trade or subcontractor: Identify the package owner accountable for rectification, ensuring ownership is clear from the moment the snagging list is issued.
- Priority classification: Indicate urgency level, particularly for safety risks, compliance issues or items that could delay practical completion certification.
- Rectification deadline: Record an agreed completion date aligned with the programme to prevent the snagging list from becoming open-ended and unmanaged.
- Status tracking field: Include a column showing whether each snag is open, in progress, completed or pending verification.
- Date of remedial completion: Capture when the corrective work was physically carried out to maintain an accurate audit trail.
- Verification sign-off: Provide space for the project manager, site manager or employer’s agent to confirm satisfactory resolution before closing the item.
- Comments and clarification notes: Allow room for access constraints, sequencing issues or coordination remarks that affect rectification planning.
- Drawing or specification reference: Link the snag to relevant contract documents where applicable to support fair assessment of compliance.
- Category grouping: Organise items under headings such as finishes, M&E, external works or compliance to improve clarity and reporting.
- Version control details: Track issue dates and revision numbers so the snagging list remains a controlled document throughout the close-out process.
Related Construction Project Management Templates
We’ve created dozens of construction project management templates for Excel, Word and Google Sheets. Here are some of them.
Bill of Quantities Template
Common across UK construction projects, a bill of quantities structures measured items, descriptions and unit rates to support competitive tendering, ongoing cost management and interim valuations, while clearly separating quantified works from items assessed on another basis.
Method Statement Template
A method statement sets out how specific construction tasks will be undertaken safely and in accordance with project requirements, outlining sequencing, responsibilities and control measures, and is typically required on UK sites before works commence or are revised.
Schedule of Values Template
A schedule of values allocates the overall contract sum into defined payment elements, enabling structured interim valuations and applications for payment, while giving both contractor and client visibility of certified amounts and the outstanding contract balance.
ProjectManager Is Perfect for Snagging Inspections and Snagging Lists
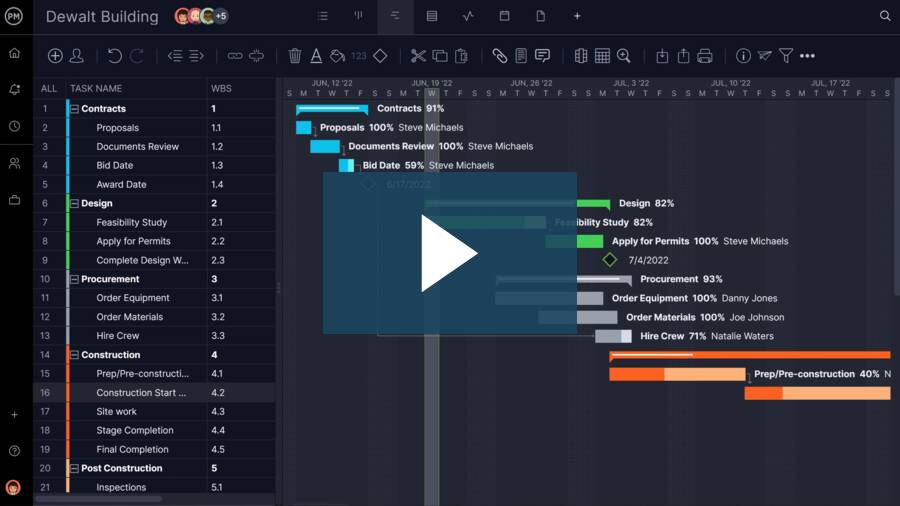
ProjectManager is a robust solution that allows project managers to create a construction schedule, allocate resources, track costs and much more. Its task list feature is ideal for making detailed snagging lists that show remaining work, due dates, status, attached files, priority level, among other details. Watch the video below to learn more!
Related Construction Project Management Content
Our content library features over 100 construction blogs, templates, ebooks and other types of content to help construction project managers better understand the many moving parts that must be managed to deliver successful construction projects. Here are some of them.
