Starting your projects in the right way makes it so much easier to manage your work and your team. While it’s tempting to dive straight in and get on with your tasks, it pays to take a bit of time at the beginning to plan out your work and check that you’ve got everything you need.
Set your projects up for success with this easy-to-use checklist. Work through the list and make sure you can say ‘yes’ to each item: then you’ll know you can start work confidently. But first, let’s run through some basics about project kickoff.
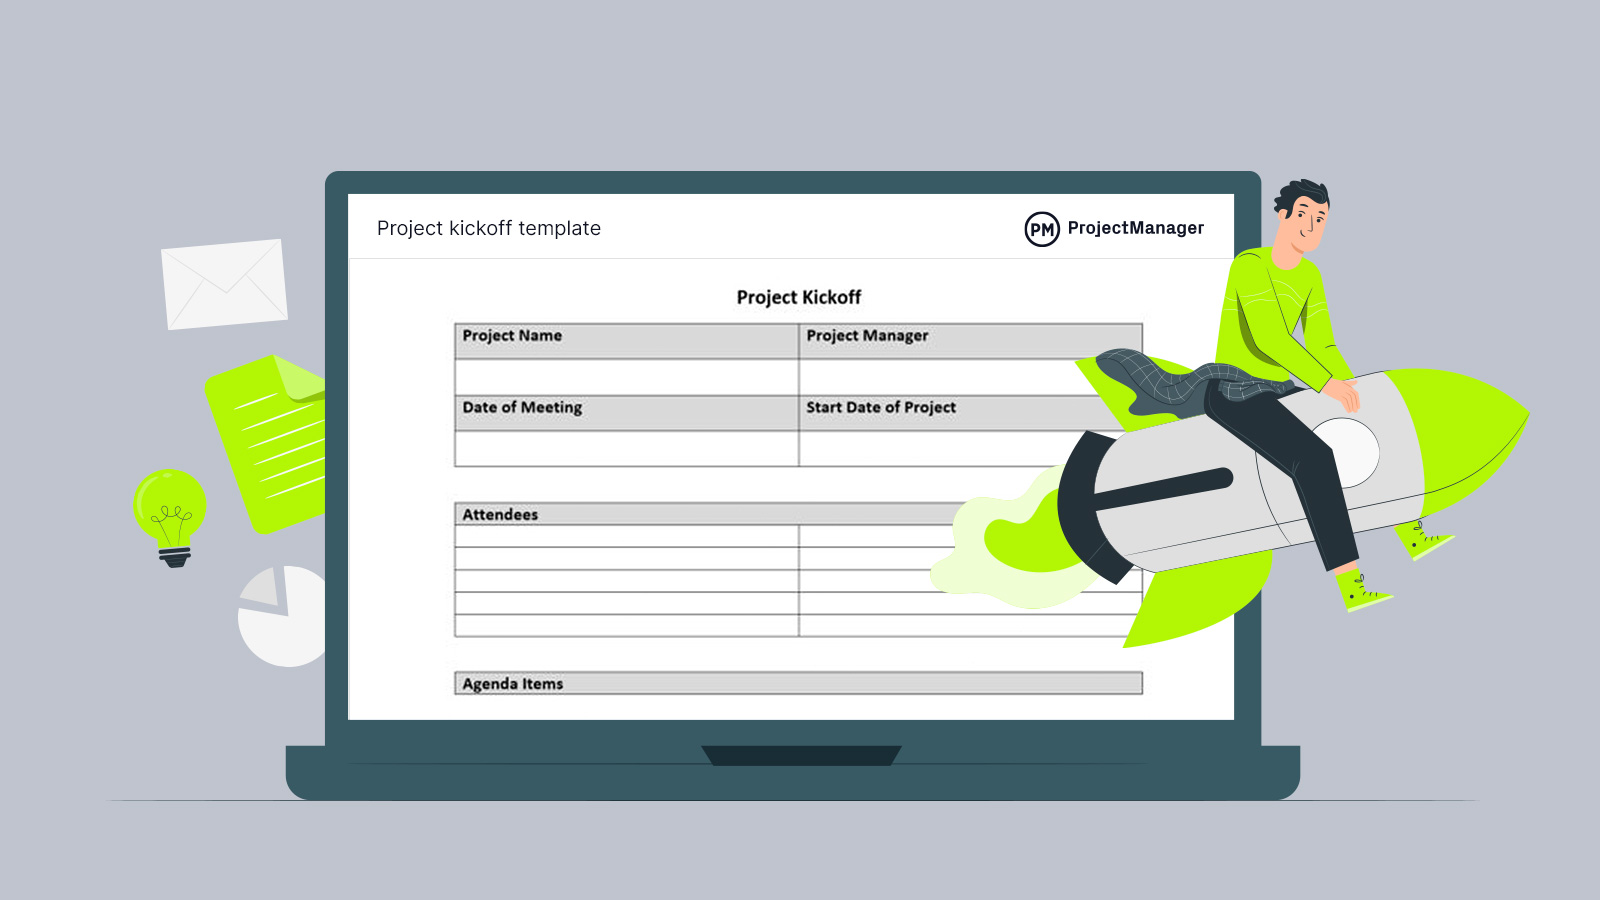
Get your free
Project Kickoff Template
Use this free Project Kickoff Template for Word to manage your projects better.
What Is Project Kickoff?
Project kickoff is the first official meeting held at the start of a project. It unites stakeholders such as the project team, the client or sponsor and other involved parties. The main goal of the kickoff meeting is to formally launch the project and ensure everyone is aligned on its goals, scope, roles and initial plans. Think of it as a way to build enthusiasm and commitment for the project.
Why Is Project Kickoff Important?
Think of a project kickoff as an investment in the project’s future. When a project kickoff is well executed, it can help set up the project for success as it sets a positive tone and encourages enthusiasm.
It establishes a shared vision for the project to ensure everyone is on the same page regarding its goals and secures buy-in from all stakeholders. It also fosters collaboration, building a sense of teamwork. During the kickoff, it’s easy to clarify key aspects of the project early on.
Project Kickoff Part 1: Define Your Project
This first section is all about making sure that you know exactly what you have to do. Spend some time asking the right questions here and you’ll create common objectives and a clear understanding of the work involved and what you are expected to deliver at the end.
- Appoint the Project Manager
That’s you. See, you can tick the first one off already! - Approve the business case
Your company should have a process for submitting and approving business cases, also referred to as the project charter. You shouldn’t start work on a project that doesn’t have a business case approved. In some firms, that could be as informal as someone emailing you to say it’s okay to go ahead. A “business case” doesn’t have to be a lengthy and complicated document: the point of this step is to make sure that someone who knows about this stuff has said that it’s okay for you to spend your time working on this. Download a free project charter template and other templates essential for project kickoff here. - Identify Project Objectives
Write down what you are trying to achieve with this project. If you did have a formal business case, you can extract the objectives from there. The purpose of this step is to be clear that you know why you are working on it and what problem the project is going to solve for the company. - Define Project Scope
Write down everything that is going to be included in the scope of the project. Then write down anything that will not be delivered: these are your “out of scope” items. Documenting it helps everyone see what you are planning to do. If they notice anything that isn’t on the list they can tell you now, rather than waiting until you’ve practically finished to ask you to include more. - Approve the Budget
Check that you’ve got the money approved! And any other resources that will be required. It’s also worth asking your management team how you can get your hands on it and sorting out the process for spending it now so there isn’t a rush to ask those questions when you need to pay a supplier. - Identify Initial Project Risks
Risks are things that might affect your ability to complete the project to the specified brief, such as a vendor letting you down or not having resources with the right skills available when you need them. Analyze any risk that could go wrong before you start doing too much of the project work – then you can prepare your Plan B and be ready in case anything on that list does happen. - Produce List of Deliverables
Deliverables are what you make on the project: a new product, a training manual, a building etc. Write down what this project is making. Then you can tick them off as you finish them and you’ll be able to see how close you are to completing the whole project. Don’t start from scratch with this list – use your project scope document as a starting point.
Watch this video with Jennifer Bridges to learn more about essential project kickoff documents.
Project Kickoff Part 2: Build Your Team
Now that you are clear about what you are doing, it’s time to work out who is going to do it.
- Appoint Project Sponsor
This is normally your manager or another senior manager who is the project’s champion. They are probably the one who asked you to manage the project in the first place. Another one you can tick off straight away! - Appoint Team Members
Can you do all the work yourself? Thought not. Work out who else you need on the team and ask them to join you. You’ll need a team charter to define the team’s roles and responsibilities, and document other important information about the project. - Identify Other Stakeholders
There will be other people who will be affected by your project, such as customers or departments in your own company who don’t need to be on the project team but who will need to be involved or kept informed. These are your stakeholders. Make a list. - Identify Suppliers
You may need to draw on other experts, consultants, suppliers or third parties. Find out who you need and prepare any contracts required. - Define Roles and Responsibilities
Now you know who is involved and affected by the project, define everyone’s role and areas of responsibility so they are clear on what you are asking them to do. A project organization chart can be an easy way to show how the different teams will be working together. - Produce Communications Plan
How are you going to keep your team and stakeholders informed with progress? A communications plan doesn’t have to be complicated: a note in your diary once a month to send a status report is good enough. - Arrange First Team Meeting
Book a meeting with everyone. This will be your kick off meeting and it’s a good opportunity to run through each person’s role and what tasks you are doing, as well as to answer any questions.
Project Kickoff Part 3: Set Up Your Tools
Finally, you’ll need to think about what tools you are going to use to make it easier to keep on top of the work. When you are managing lots of different activities you’ll need some systems and processes to save you time.
- Select Project Management Software
If you don’t already have project management software in your company, choose which tool you are going to use. You can stick with email and spreadsheets, but if you’ve got more than three people in the team you’ll soon find that becomes difficult and you need a better tool so choose one now. Don’t forget the collaborative benefits on interaction. - Set Up User Accounts
Give everyone user accounts for your project management software and make sure they know how to use it. - Set Up Project Filing System
Your project filing system can be anything from remembering to keep all your notes in one notebook to a fully-featured document management system. In reality, it’s most practical to use your project management tools to store documents related to the project so everything is in one place. Go ahead and upload those documents you created in Part 1 now. - Create Task List
Your project task list is the starting point for planning the work. Add the tasks to your online tools so that your project management To Do list is available wherever your team is working. - Create Project Schedule
Add some dates to the tasks on your list and voilà! A project schedule. Share this with your team and make sure they know which of the tasks will be their responsibility.
Use this list to start each of your projects off on the right foot. When you’ve ticked off all the items you’ll be confident that everyone knows what the project is going to deliver and how you are going to get there as a team.
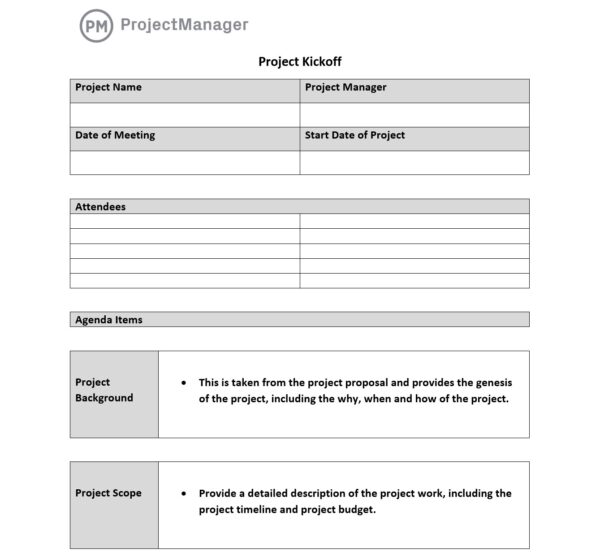
Project Kickoff Template
This project kickoff template helps you gather the elements about your project that you’d like to address with your team during a project kickoff meeting such as the project background, scope, timeline and roles and responsibilities.
Running Your Project Kickoff Meeting
Now that you have a better understanding of what a project kickoff is and how to set up a checklist, consider using these helpful tips.
- Plan Before the Meeting: Nobody likes to waste time in an unproductive meeting. Define the purpose of the meeting and articulate exactly what you want to accomplish during it. Ensures all stakeholders have the invitation and created a detailed agenda. If any documents are needed, compile them ahead of time.
- Clearly Communicate the Vision and Goals: Project stakeholders will be more inspired to participate in the project kickoff when they understand the “why” behind the project. Note its strategic importance and state the project objectives and desired outcomes. Paint a picture so everyone knows what success looks like.
- Establish Communication Channels: How and when will communication occur throughout the project? This is a simple yet important thing to clarify during project kickoff. Will there be regular meetings, emails or specific tools used to communicate? This ties into the reporting requirements and frequency. If risks arise, be sure to have a plan on how to mitigate them.
- Foster Open Discussion: During the project kickoff, encourage active participation and questions from all attendees. Make sure to leave plenty of time for questions at the end of the meeting. If there are any concerns, address them thoughtfully.
- Follow Up After the Kickoff: When the meeting is done, the work doesn’t stop. Distribute a summary of the meeting that outlines key action items, owners and deadlines. Ensure that everyone understands their role and follow up with them as needed. You can also send a follow-up email to reiterate the project goals, key takeaways and excitement for the project.
Make starting projects easy with ProjectManager. It’s the fastest way to create professional, online project workspaces. Simple team collaboration, an intuitive interface and access from anywhere make it the choice for thousands of project managers around the world. Click here to start using our software for free.
